I got to spend most of the day today in my craft corner- with my
Kringle Candle Hot Chocolate Candle - which has made me one happy camper! I have my Valentine's Day cards almost done- they are just waiting on my order of
My Pink Stamper Stamps! My order, along with
Meg's should be here this week and I can't wait!
These were fairly easy cards to make- the photos were taken on my cell phone- so hopefully they are clear enough for you to see the detail.
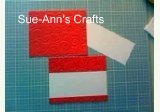
Heres what I used:
- Cricut Storybook Cartridge, 2 1/2 inch heart cut (red cardstock), and shadow cut (white cardstock), on my Cricut Create
- Red Cardstock (4 3/4 x 3 3/4)
- White Cardstock (4 3/4 x 2)
- Cuddlebug and Embossing Folder- Swirls' (thanks Meg!)
- Foam Dots
- Zig Glue Pens
- Tape Runner
- Black Ink Pad
- My Pink Stamper Stamps- Love-alicious
- Tattered Angels Glimmer Mist- Pearl
- Assorted Cricut tools for removing cuts from the mat and folding the cards
- 5x4 White Stock Cards (I like the pre-made cards because they are readily availble in the craft store and come with envelopes!)
I like to set my projects up "assembly line" style. I cut everything, piece the parts together if needed and then put it all togehter at the end.
The first thing I did since it takes a little bit to dry was to to take the 2 1/2 inch white heart and spray it with the Glimmer Mist. Because you are wetting the paper- it will curl. My little trick with this is to take a old cricut mat and line up the items you are going to spray on the mat. Sometimes the mats are not sticky enough to hold the paper while the machine cut, but they are still sticky enough to hold them while the mist dries. If your misted paper still starts to curl, just tuck them under a book for a few minutes after they are dry.
Now, lets start putting the pieces together!
Before I put the heart on, I used some of my Dimensional Foam Adhesives. Just remember- the thicker your card- the more it will cost to mail (if you are mailing it) so you might want to take it to the post office and have them check. You dont want your hard work coming back to you for more postage!
And here is our finished project! Well almost finshed anway- I need my Pink Stamper Stamp set to come so I can finish the front! To the right of the heart, I plan to use the stamp that says "All you need is love - John Lennon". Just deciding if I want to use red or black ink....
It is hard to see the glimmer mist accent in the pictures, but those who receive the card will notice!
This project didnt take long at all to complete. Everyone will think it did- but it didnt! And I think the people who are getting them will really enjoy them. Its alwasy so nice to get a homemade card!